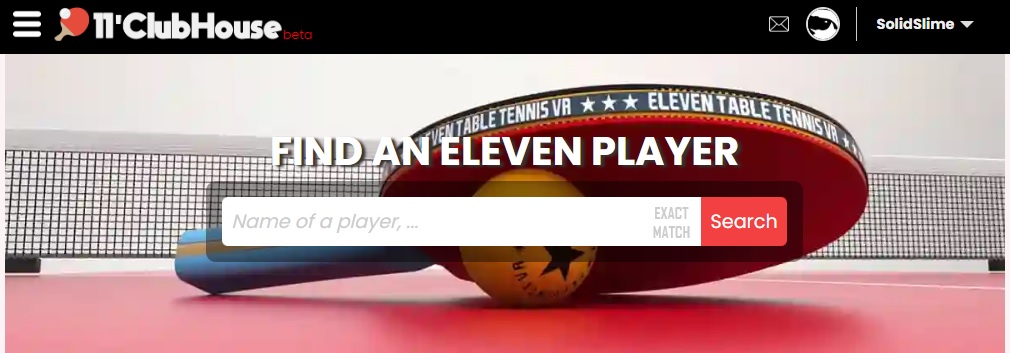
Hello friends, today I’m going to introduce the best Eleven VR social network: https://11clubhouse.com .
This is a professionally made fan-made website that answers a lot of questions you might have:
🤔How many players are there?
🏆Who are the best players?
🏓Who are playing right now?
📊What’s the match history of someone?
⚙️What equipment / settings does someone use?
🔄What’s the head-to-head history between two players?
🌍How many people are there from certain country/area?
😊How friendly/sportsman is a certain player likely to be?
…
Some of these features require a user account. After registering an account, you can also link it to your ETT account through simple steps. I highly recommend to do that.
Among other things, this website is also free and has no advertisement. There’s a donation link, but the developer is so modest that the link is barely visible at the bottom of the page (and is only shown after login). If you wish to help finance the website, please donate at https://11clubhouse.com/donation/ .
My Brazilian friend, real life table tennis coach Wlad is making some amazing FREE training tutorials on Youtube.
In the videos, he covers all the basic techniques, teaches you how to handle the spin or the speedy serves, and even goes beyond that to teach you different ways of handling certain spins in the advanced training programs. All videos come with downloadable ball machine drills!
I think it’s wonderful that ElevenVR is bringing table tennis to a lot of people that have never or rarely played the sport in real life, but I also think it’s extremely important for such players to at least try to learn the proper TT techniques: Good TT techniques are more efficient, lead to less injury. Together with good adapters like SolidSlime, they are the keys to easier real life<->VR skill transfer.
So no matter what your level is at, please check out his Youtube channel. It can be the key to the next jump in your Elo rating.
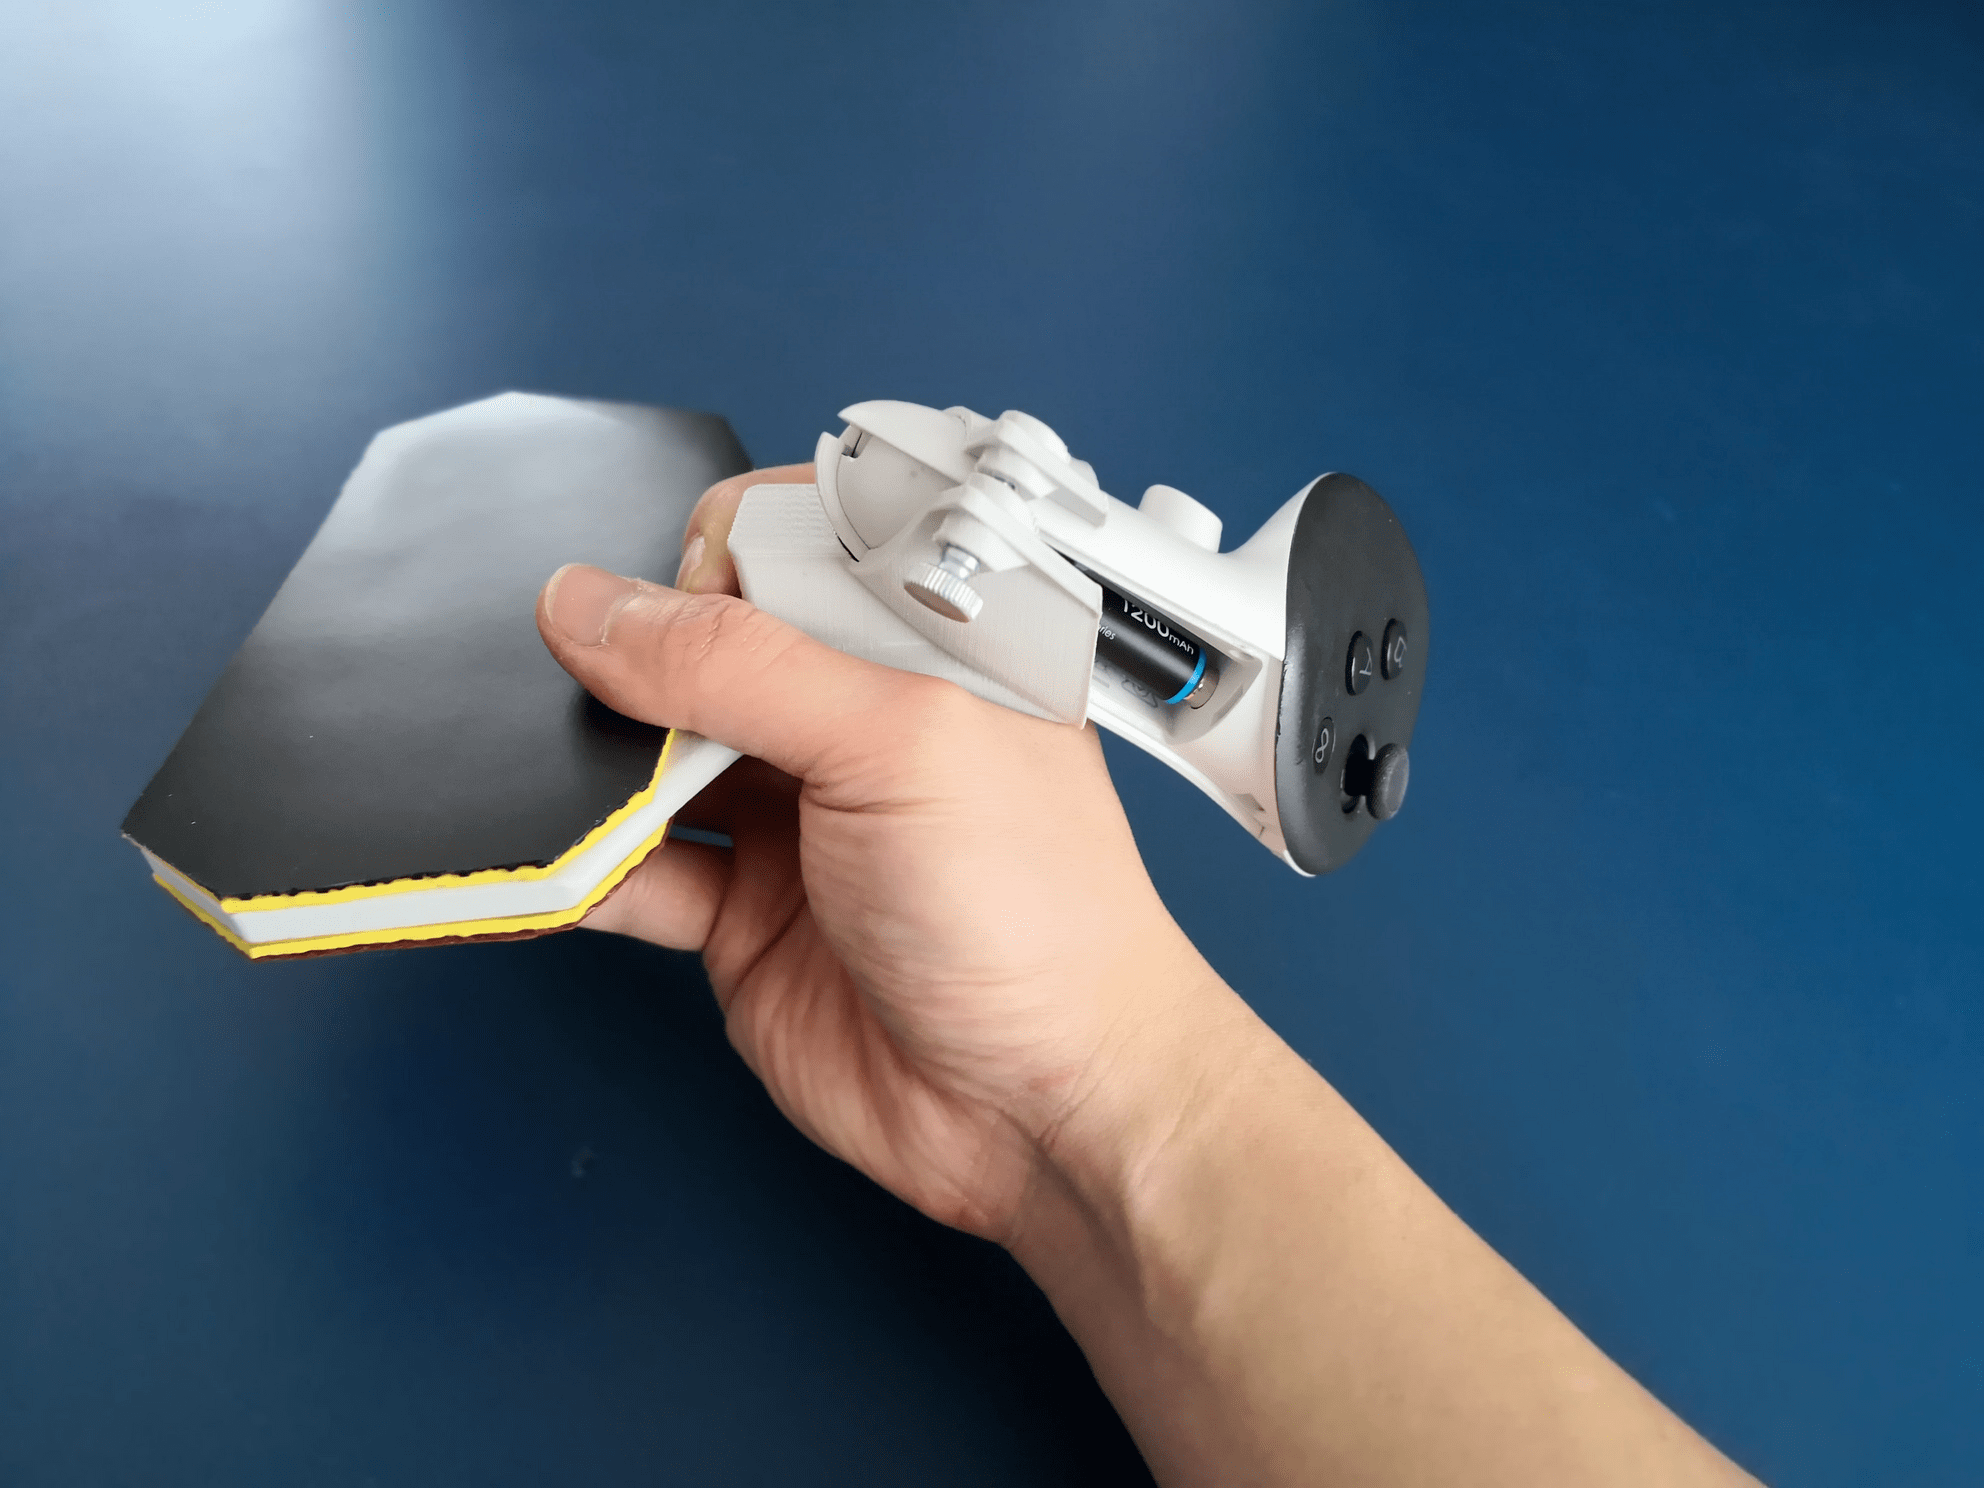
Hi all, I’m happy to announce CyberPen: the first known Q3 PENHOLD adapter that doesn’t suffer from any obvious tracking problem in any strokes, no matter RPB or TPB(*).
Comfort-wise, this adapter supplies the FULL racket surface, thus is suitable for all kinds of finger placement. It also has a handle that is a combination of both CPen and JPen. Since the Q3 controller is placed near the handle, we use various methods to adjust the center of weight upwards (varied infill, rubbers, possibility to add additional weight). The result center of weight is slightly above the handle top edge. Not particularly like realistic paddles, but is surprisingly comfortable to swing around.
As always, the adapter is available at https://vrpingpong.net/ along with the adapters for other styles and other devices.
(*)RPB: Reverse Penhold Backhand TPB: Traditional Penhold Block For video please search for “RPB vs TPB” on Youtube.
This is a cool trick that not everyone knows, but it’s an extremely important one, especially for adapter/paddle users.
To boost the haptics, open Menu->Settings, click the “carrot” icon on the top right to open the advanced menu, open “controller settings” and increase both haptics sliders to the right most position. The first one increases the rumbling strength, and the second one increases the rumbling time. Both contributes to the feeling.
While you are in there I’d suggest to enable “catch haptic feedback” too. That one makes the non-paddle controller to rumble when a ball is spawned.
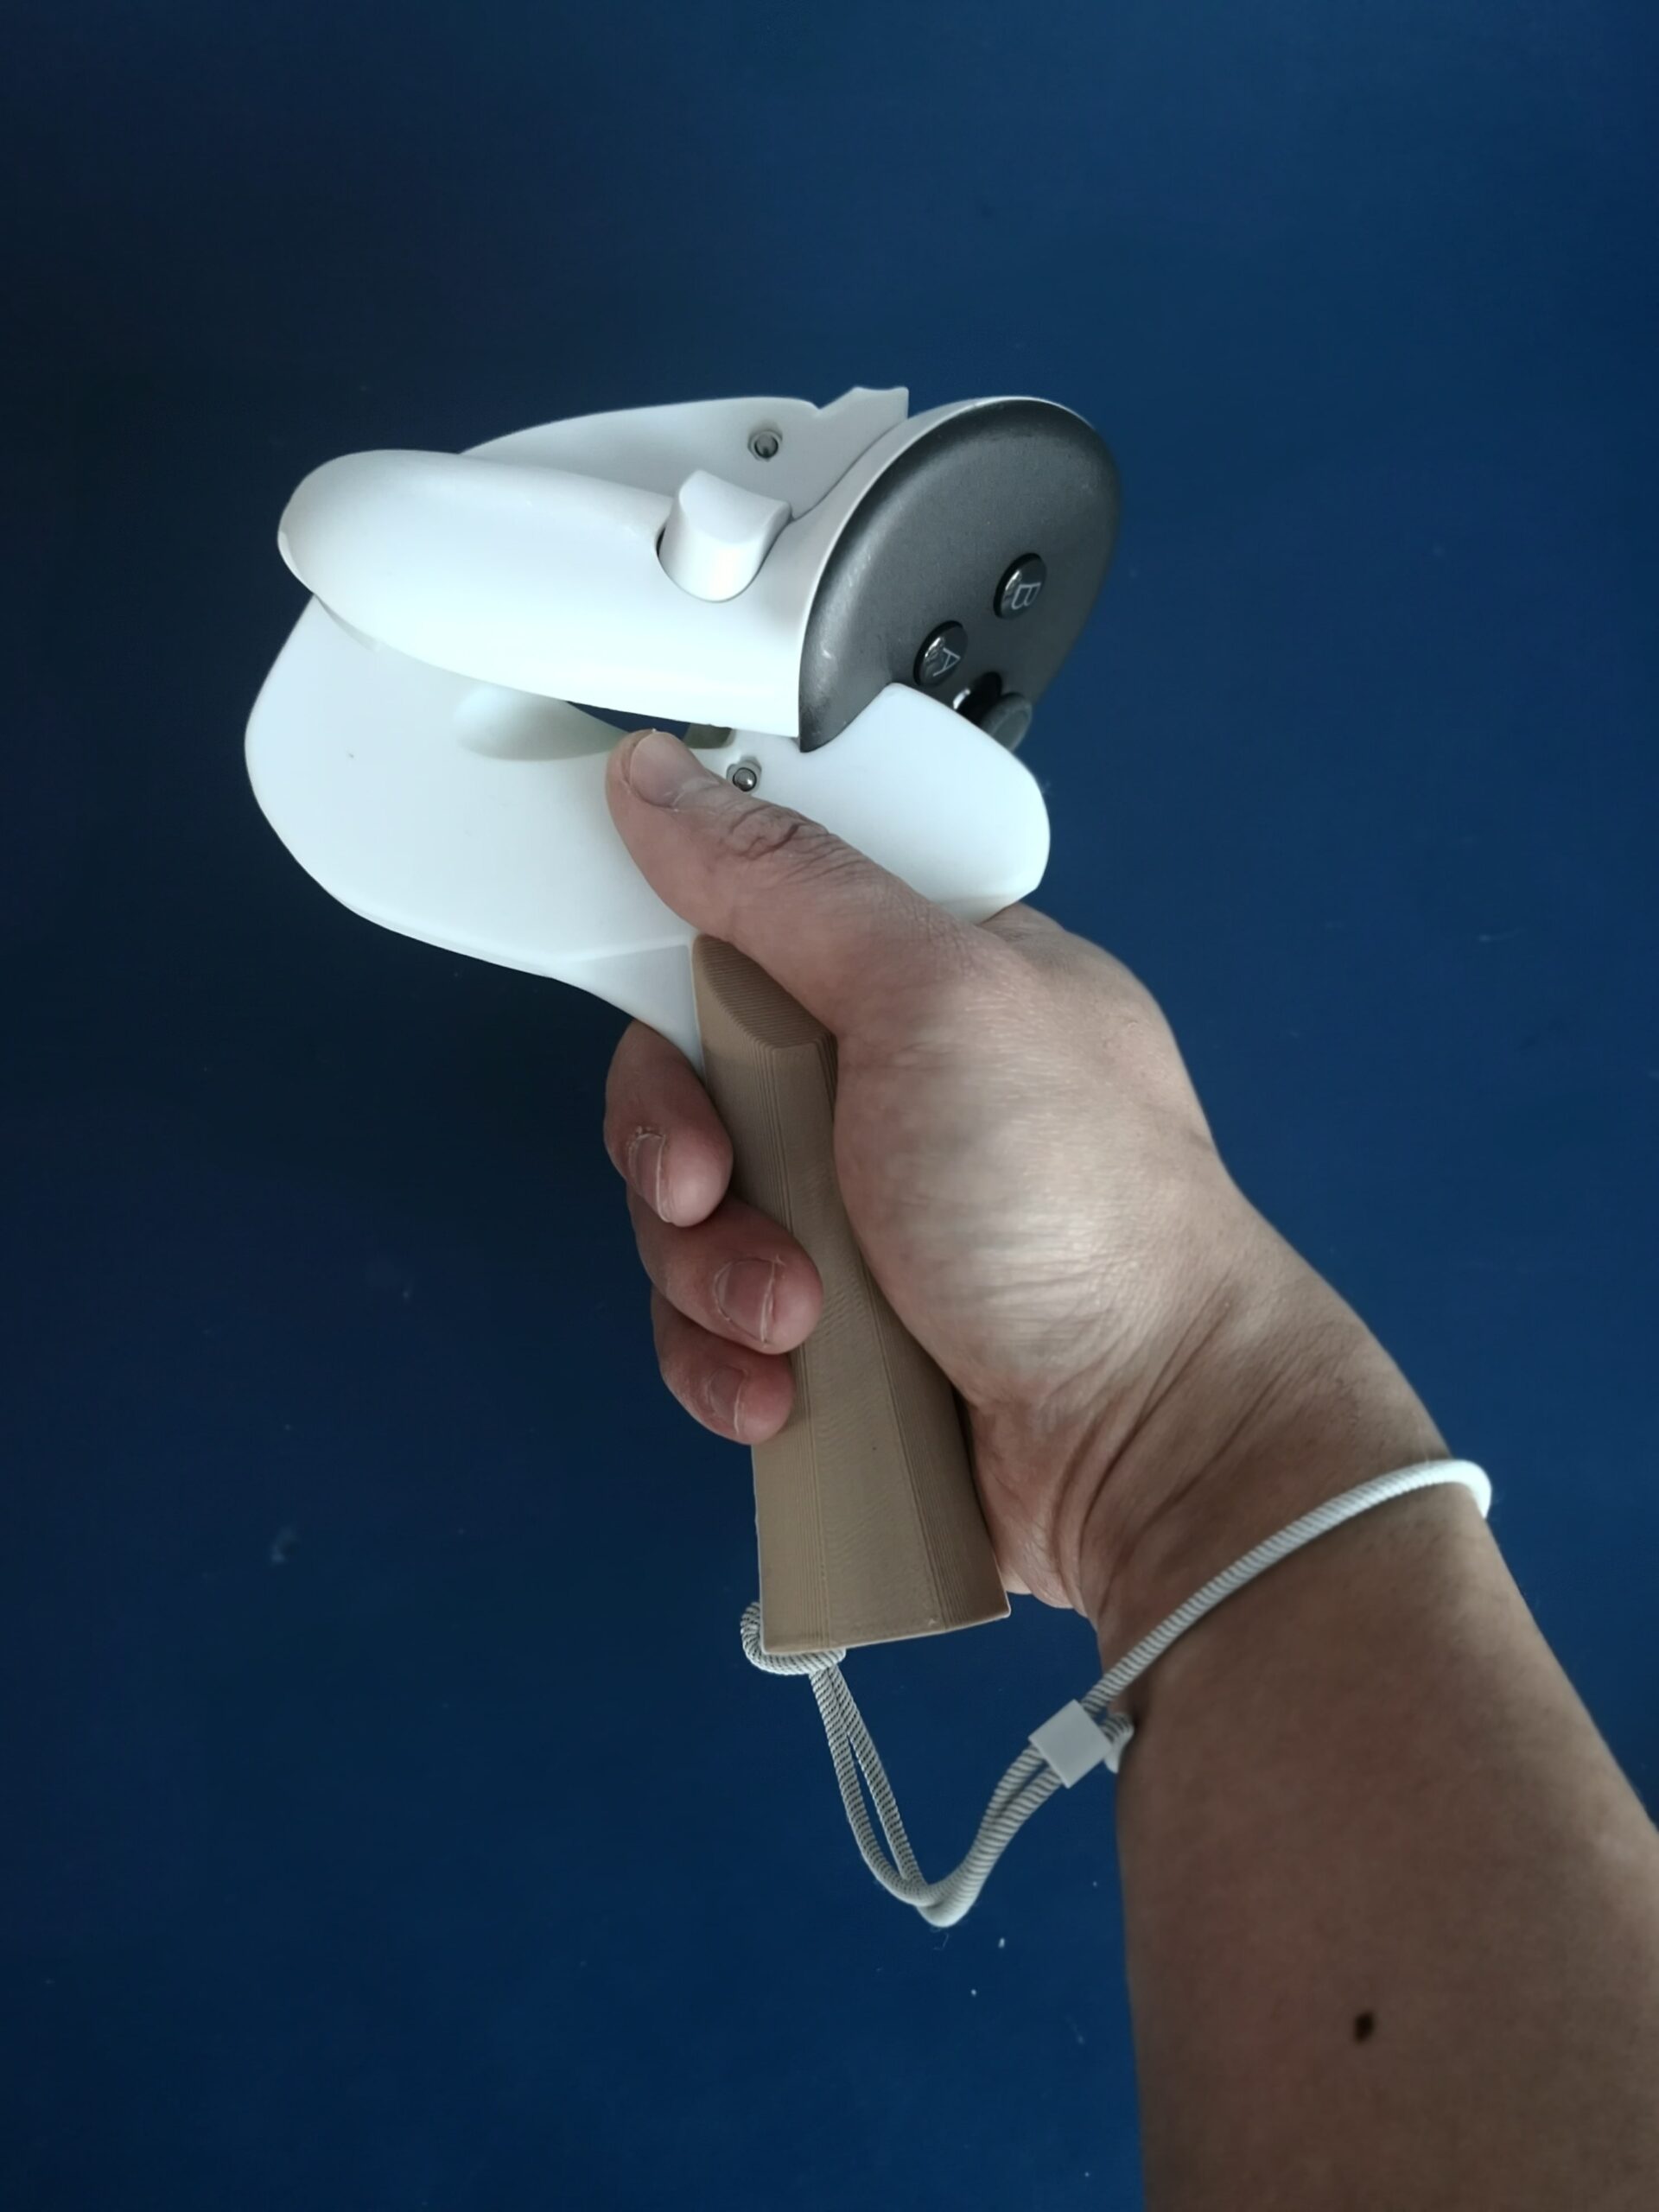
The edge that clips to the battery compartment of the controller has been rounded. This makes it easier to put the controller in and out.
v2.2
The nuts don’t fall out anymore.
There is a hole at the bottom of the handle to allow wrist strap to be used.
The nut and screws are also now perpendicular to the adapter surface.
Now it should be possible to use the bulky rechargeable batteries that come with official Meta rechargeable dock. I haven’t tested this it because I don’t have that battery. The change is done based on customer feedback.
As always, if you have bought a SolidSlime adapter before and would like to upgrade to the new version, please reach out to me (thesolidslime@gmail.com) for discount. Thank you.
As a designer of VR accessories like Table Tennis Adapters and Pickleball Adapters, I often get asked about how to make a good in-game paddle position, which is understandable: having a good in-game paddle position is one of the keys to make real life <-> VR skill transfer as smooth as possible.
So here is a step by step guide to make sure you will have a near perfect paddle position in Eleven Table Tennis.
(Other games can use the similar methodology as well. Eleven Table Tennis currently provides the best tool to achieve the goal. Thanks carrotstien!)
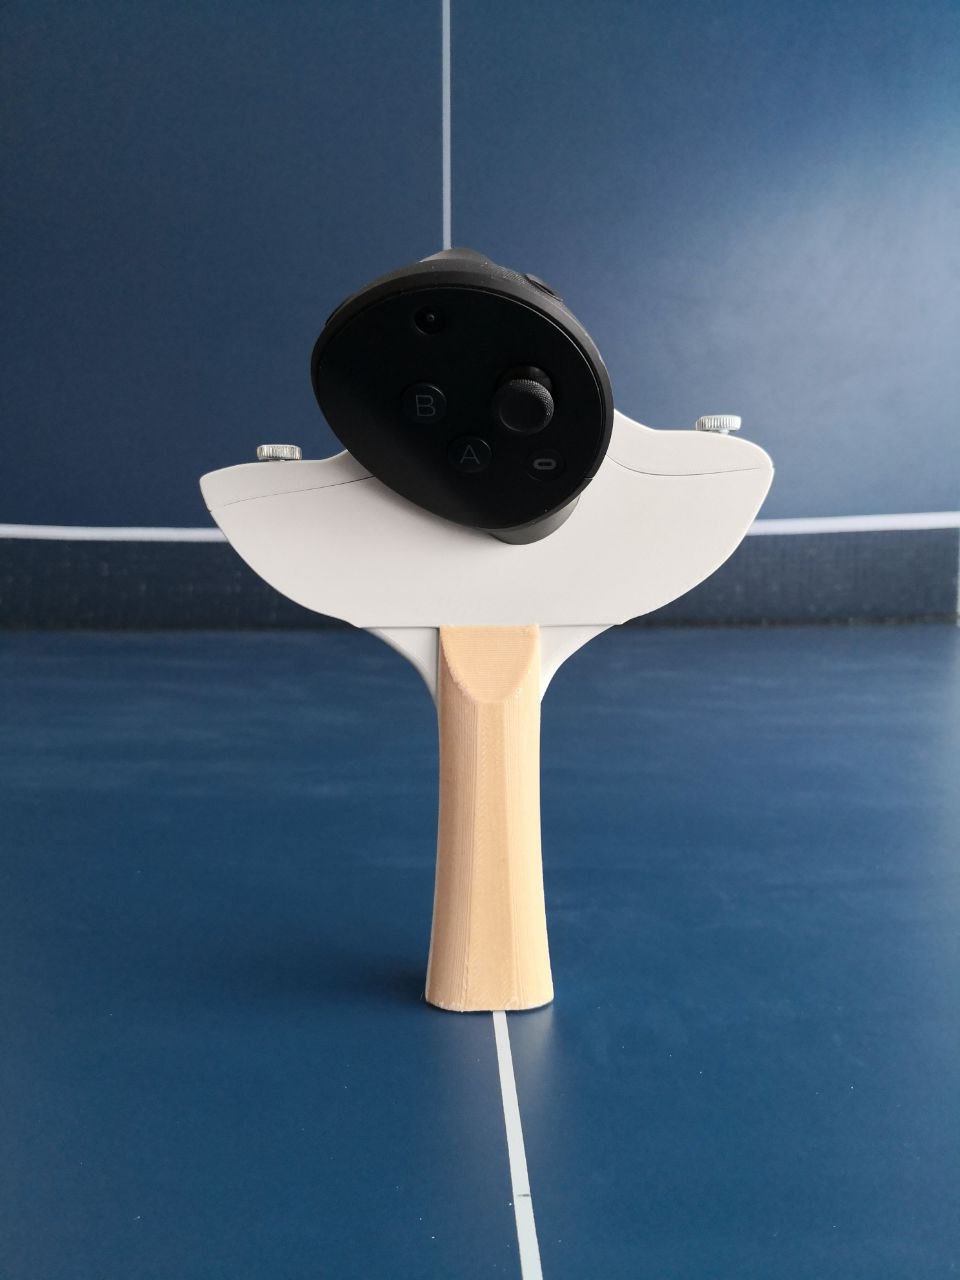
1. Preparation
This is an optional step. Ideally, you should make an adapter with a straight handle (without the “side pieces”), like below. The straight surfaces will help in the next steps. Also ideally, you should have a box that has two precisely parallel surfaces.
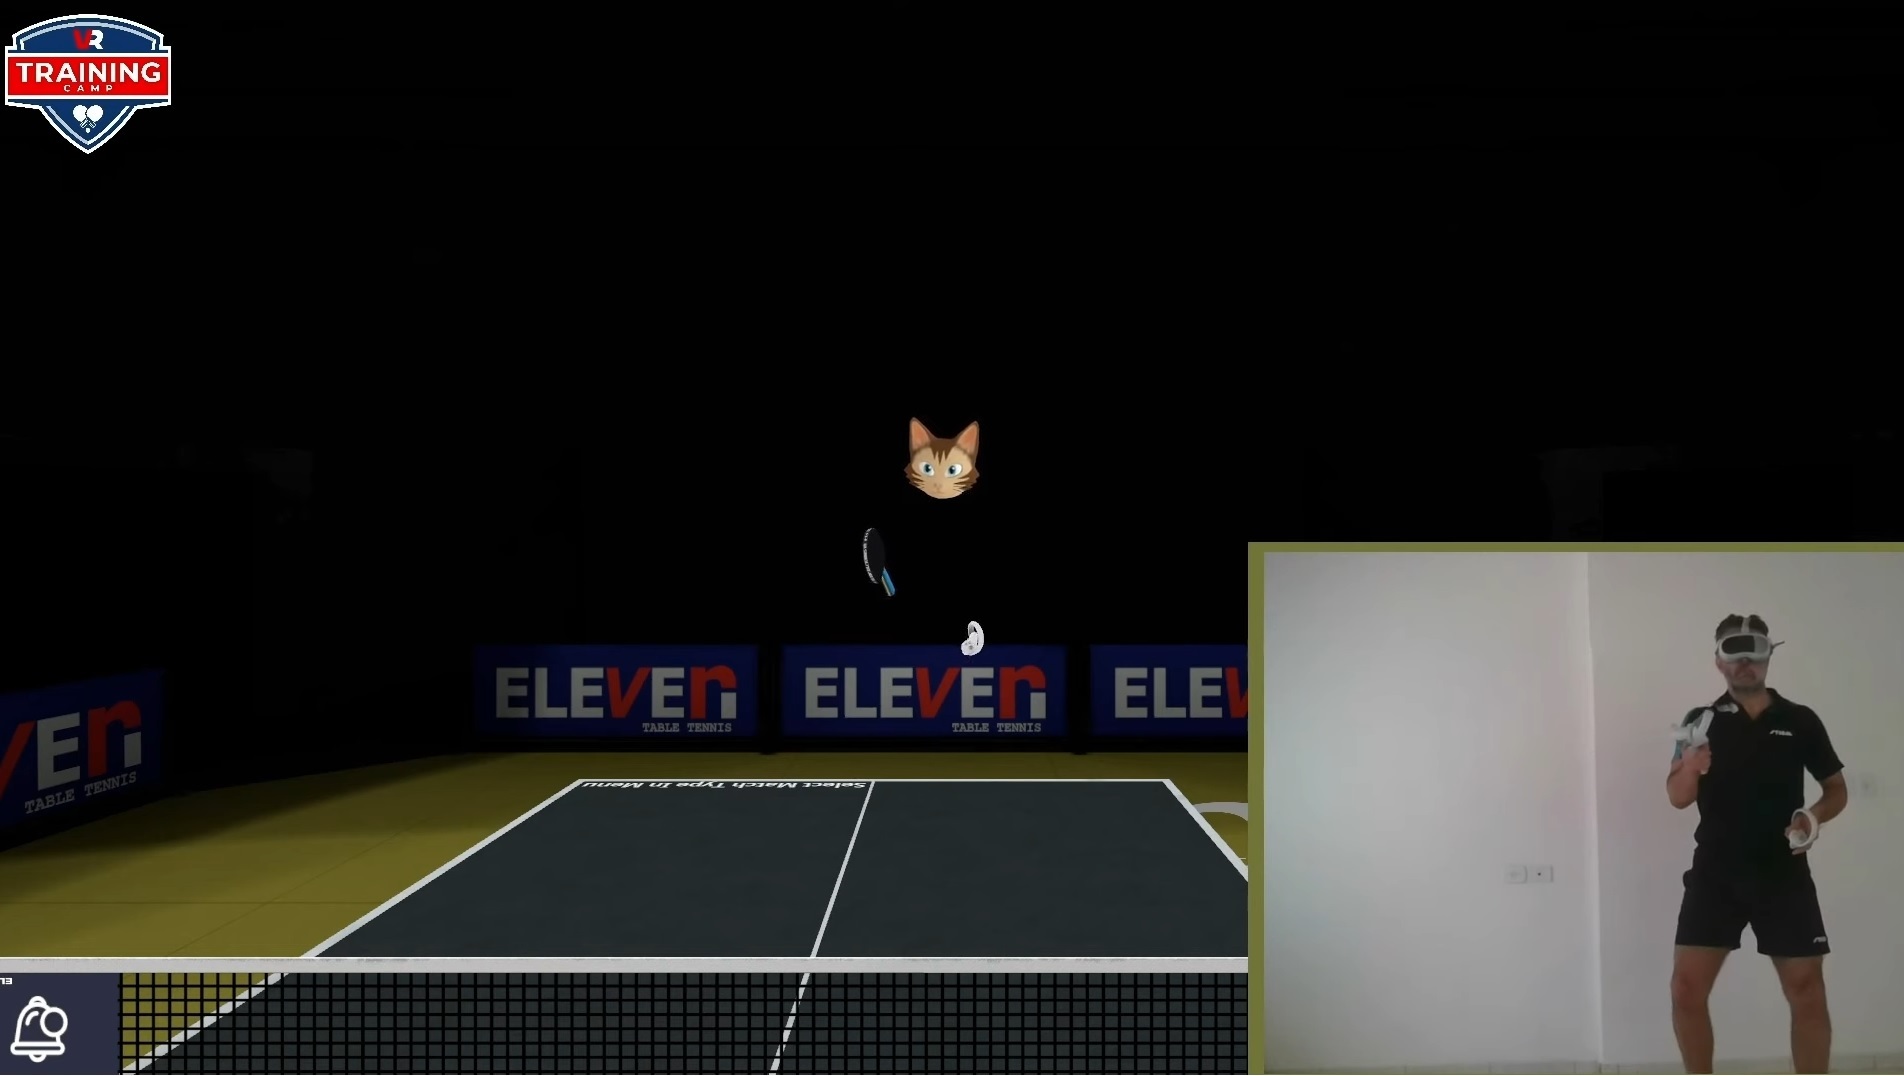
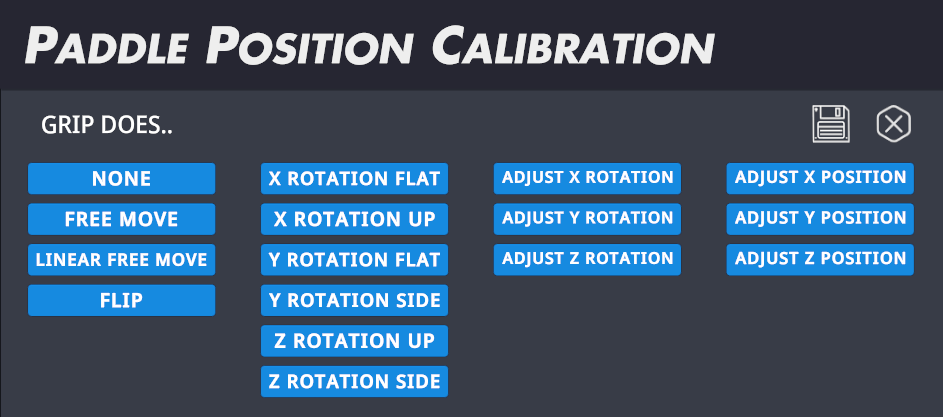
2. Open “Paddle Calibration” tool in game.
From now on all steps will be done using this tool. It’s located in “settings->🥕->(look at left side) paddle calibration”.
3. Calibrate XYZ rotation
Put the box on the floor. (Why use a box instead of just the floor? Because for “flat” position, it’s not possible to put the paddle on the floor)
Put the paddle “flat” (the largest surface on the paddle facing downwards) on top of the box. Click “X ROTATION FLAT” a few times with the other controller, save, and then do the same with “Y ROTATION FLAT”.
Put the paddle “up” (the bottom of the handle facing downwards) on top of the box. Do the thing for all buttons with “UP” in it.
Put the paddle “side” (the side of the handle facing downwards, this is why it’s useful to have a straight handle) on top of the box. Do the thing for all buttons with “side” in it.
Obviously, make sure the LEDs are in view while doing everything.
Now all the rotation values should be correct.
4. Calibrate XYZ position
Pick up the paddle , hold it in one hand, and then use the other controller to trace the contour of the paddle . Use the contour of the parts that are symmetrical, for example, handle or blade. Observe in VR while doing the tracing.
If the other controller clips into the handle on one side but is far away from the handle on the other side, then click one of the “adjust X/Y/Z position” buttons, press and hold the grip button on the other controller while moving the paddle to adjust the position on that axis. Save after you have got a good result after each axis.
X is left/right along the blade surface, and can be calibrated by using the handle as reference. Y is up/down along the blade surface (tip: use the bottom of the rubber as reference). Z is forward/backward against the blade surface, and can be calibrated by using the handle as reference.
After these steps you should have a “good enough” result, because both rotations and positions are very accurate. But if you are as OCD as me, read on!
5. Bonus: Calibrate using in-game paddle model
Here’s the model file of the paddle model in Eleven Table Tennis, with permission from the developer:
Merge it with the adapter model in some way. Print it out.
Now you can calibrate everything by tracing the contour of this new…stitch-up monster paddle adapter and make sure that in VR, the controller model in the other hand grazes the contour of the racket perfectly on all the edges/surfaces.
And that my friend, is how I got the perfect paddle position of SolidSlime Quest 3 Adapter for Eleven Table Tennis.
I hope I didn’t miss anything. If I did, or if you have a better method, please feel free to leave a comment or send me a message!
We understand your struggles and are thrilled to present an adapter that exceeds all your expectations. Say goodbye to compromises and embrace a superior TT experience with the SolidSlime Penhold adapter v2 for Quest 2.
Drawing from my personal experience of two decades in penhold play (only adopting shakehand since I started playing Eleven Table Tennis!), I was deeply frustrated by the lack of a comprehensive solution. That’s why I collaborated with esteemed penhold players like FocusGUANfor several months, and today, I’m proud to announce the launch of the Penhold adapter v2!
Designed and meticulously tested, this game-changing adapter is now available for order in our shop, with worldwide partners synchronized for a seamless experience. The shop address is at https://vrpingpong.net/ .
Similar to our adapters for other handle types (FL/ST/AN), the CPen adapter features user-friendly thumb screws, allowing effortless installation and removal in a matter of seconds. However, what truly sets the CPen adapter apart are its unique design elements catered specifically to penhold players. Take a look at the image below to see for yourself.
The most significant improvement in this version is the ample space on the backside, providing a comfortable fit for all your fingers. Whether you prefer the reverse penhold backhand (RPB) or the traditional penhold block (TPB), this adapter will feel just as comfortable and natural as your real-life racket.
We are incredibly proud and excited about the outcome of this project, and we genuinely believe it will bring immense joy to countless penhold players like you.
/SolidSlime
AdapterPenhold gripFree your fingers!Adapter back side
Quest Pro controller is a brave new step by Meta. It can be used with either Quest Pro headset, or Quest 2 headset (which I am using).
This controller uses its own 3 cameras to track itself. So the user doesn’t need to worry about controller leaving the headset camera view again. In ETT terms, this means the player can perform a very large&sustained back-swing for that juicy forehand loop. They can also do behind-the-back shots with ease.
Benefit comes with cost too, the Quest Pro controller itself is around 160g, so with the adapter, the whole racket is around 210g, which is still within the range of real TT paddle weights, especially for loopers.
For me, the weight actually was quite easy to get used to. The racket still has a realistic center of weight, so with the somewhat proper technique, I didn’t get any injury or discomfort after the 2 weeks ongoing testing. In fact, I am in love with this controller right now, because the added weight helps stabilize the racket angle, and I feel its tracking is actually slightly better than the Quest 2 controllers.
I’ll keep using the Quest Pro controllers with my Quest 2 headset and see if it will help me to break the 2700 ELO threshold.
This website uses cookies to improve your experience while you navigate through the website. Out of these, the cookies that are categorized as necessary are stored on your browser as they are essential for the working of basic functionalities of the website. We also use third-party cookies that help us analyze and understand how you use this website. These cookies will be stored in your browser only with your consent. You also have the option to opt-out of these cookies. But opting out of some of these cookies may affect your browsing experience.
Necessary cookies are absolutely essential for the website to function properly. These cookies ensure basic functionalities and security features of the website, anonymously.
Cookie
Duration
Description
cookielawinfo-checkbox-analytics
11 months
This cookie is set by GDPR Cookie Consent plugin. The cookie is used to store the user consent for the cookies in the category "Analytics".
cookielawinfo-checkbox-functional
11 months
The cookie is set by GDPR cookie consent to record the user consent for the cookies in the category "Functional".
cookielawinfo-checkbox-necessary
11 months
This cookie is set by GDPR Cookie Consent plugin. The cookies is used to store the user consent for the cookies in the category "Necessary".
cookielawinfo-checkbox-others
11 months
This cookie is set by GDPR Cookie Consent plugin. The cookie is used to store the user consent for the cookies in the category "Other.
cookielawinfo-checkbox-performance
11 months
This cookie is set by GDPR Cookie Consent plugin. The cookie is used to store the user consent for the cookies in the category "Performance".
viewed_cookie_policy
11 months
The cookie is set by the GDPR Cookie Consent plugin and is used to store whether or not user has consented to the use of cookies. It does not store any personal data.
Functional cookies help to perform certain functionalities like sharing the content of the website on social media platforms, collect feedbacks, and other third-party features.
Performance cookies are used to understand and analyze the key performance indexes of the website which helps in delivering a better user experience for the visitors.
Analytical cookies are used to understand how visitors interact with the website. These cookies help provide information on metrics the number of visitors, bounce rate, traffic source, etc.
Advertisement cookies are used to provide visitors with relevant ads and marketing campaigns. These cookies track visitors across websites and collect information to provide customized ads.